We have found someone to make a faux-round door for us and Bella created a rendering of the look of the front of the house. Very whimsical!

We have found someone to make a faux-round door for us and Bella created a rendering of the look of the front of the house. Very whimsical!
The foam that helps form the shotcrete is being installed and there is a lot of work on the retaining wall in front of the building. At the same time, fixture boxes and electrical conduits are placed on the shell – they will soon be buried in concrete.


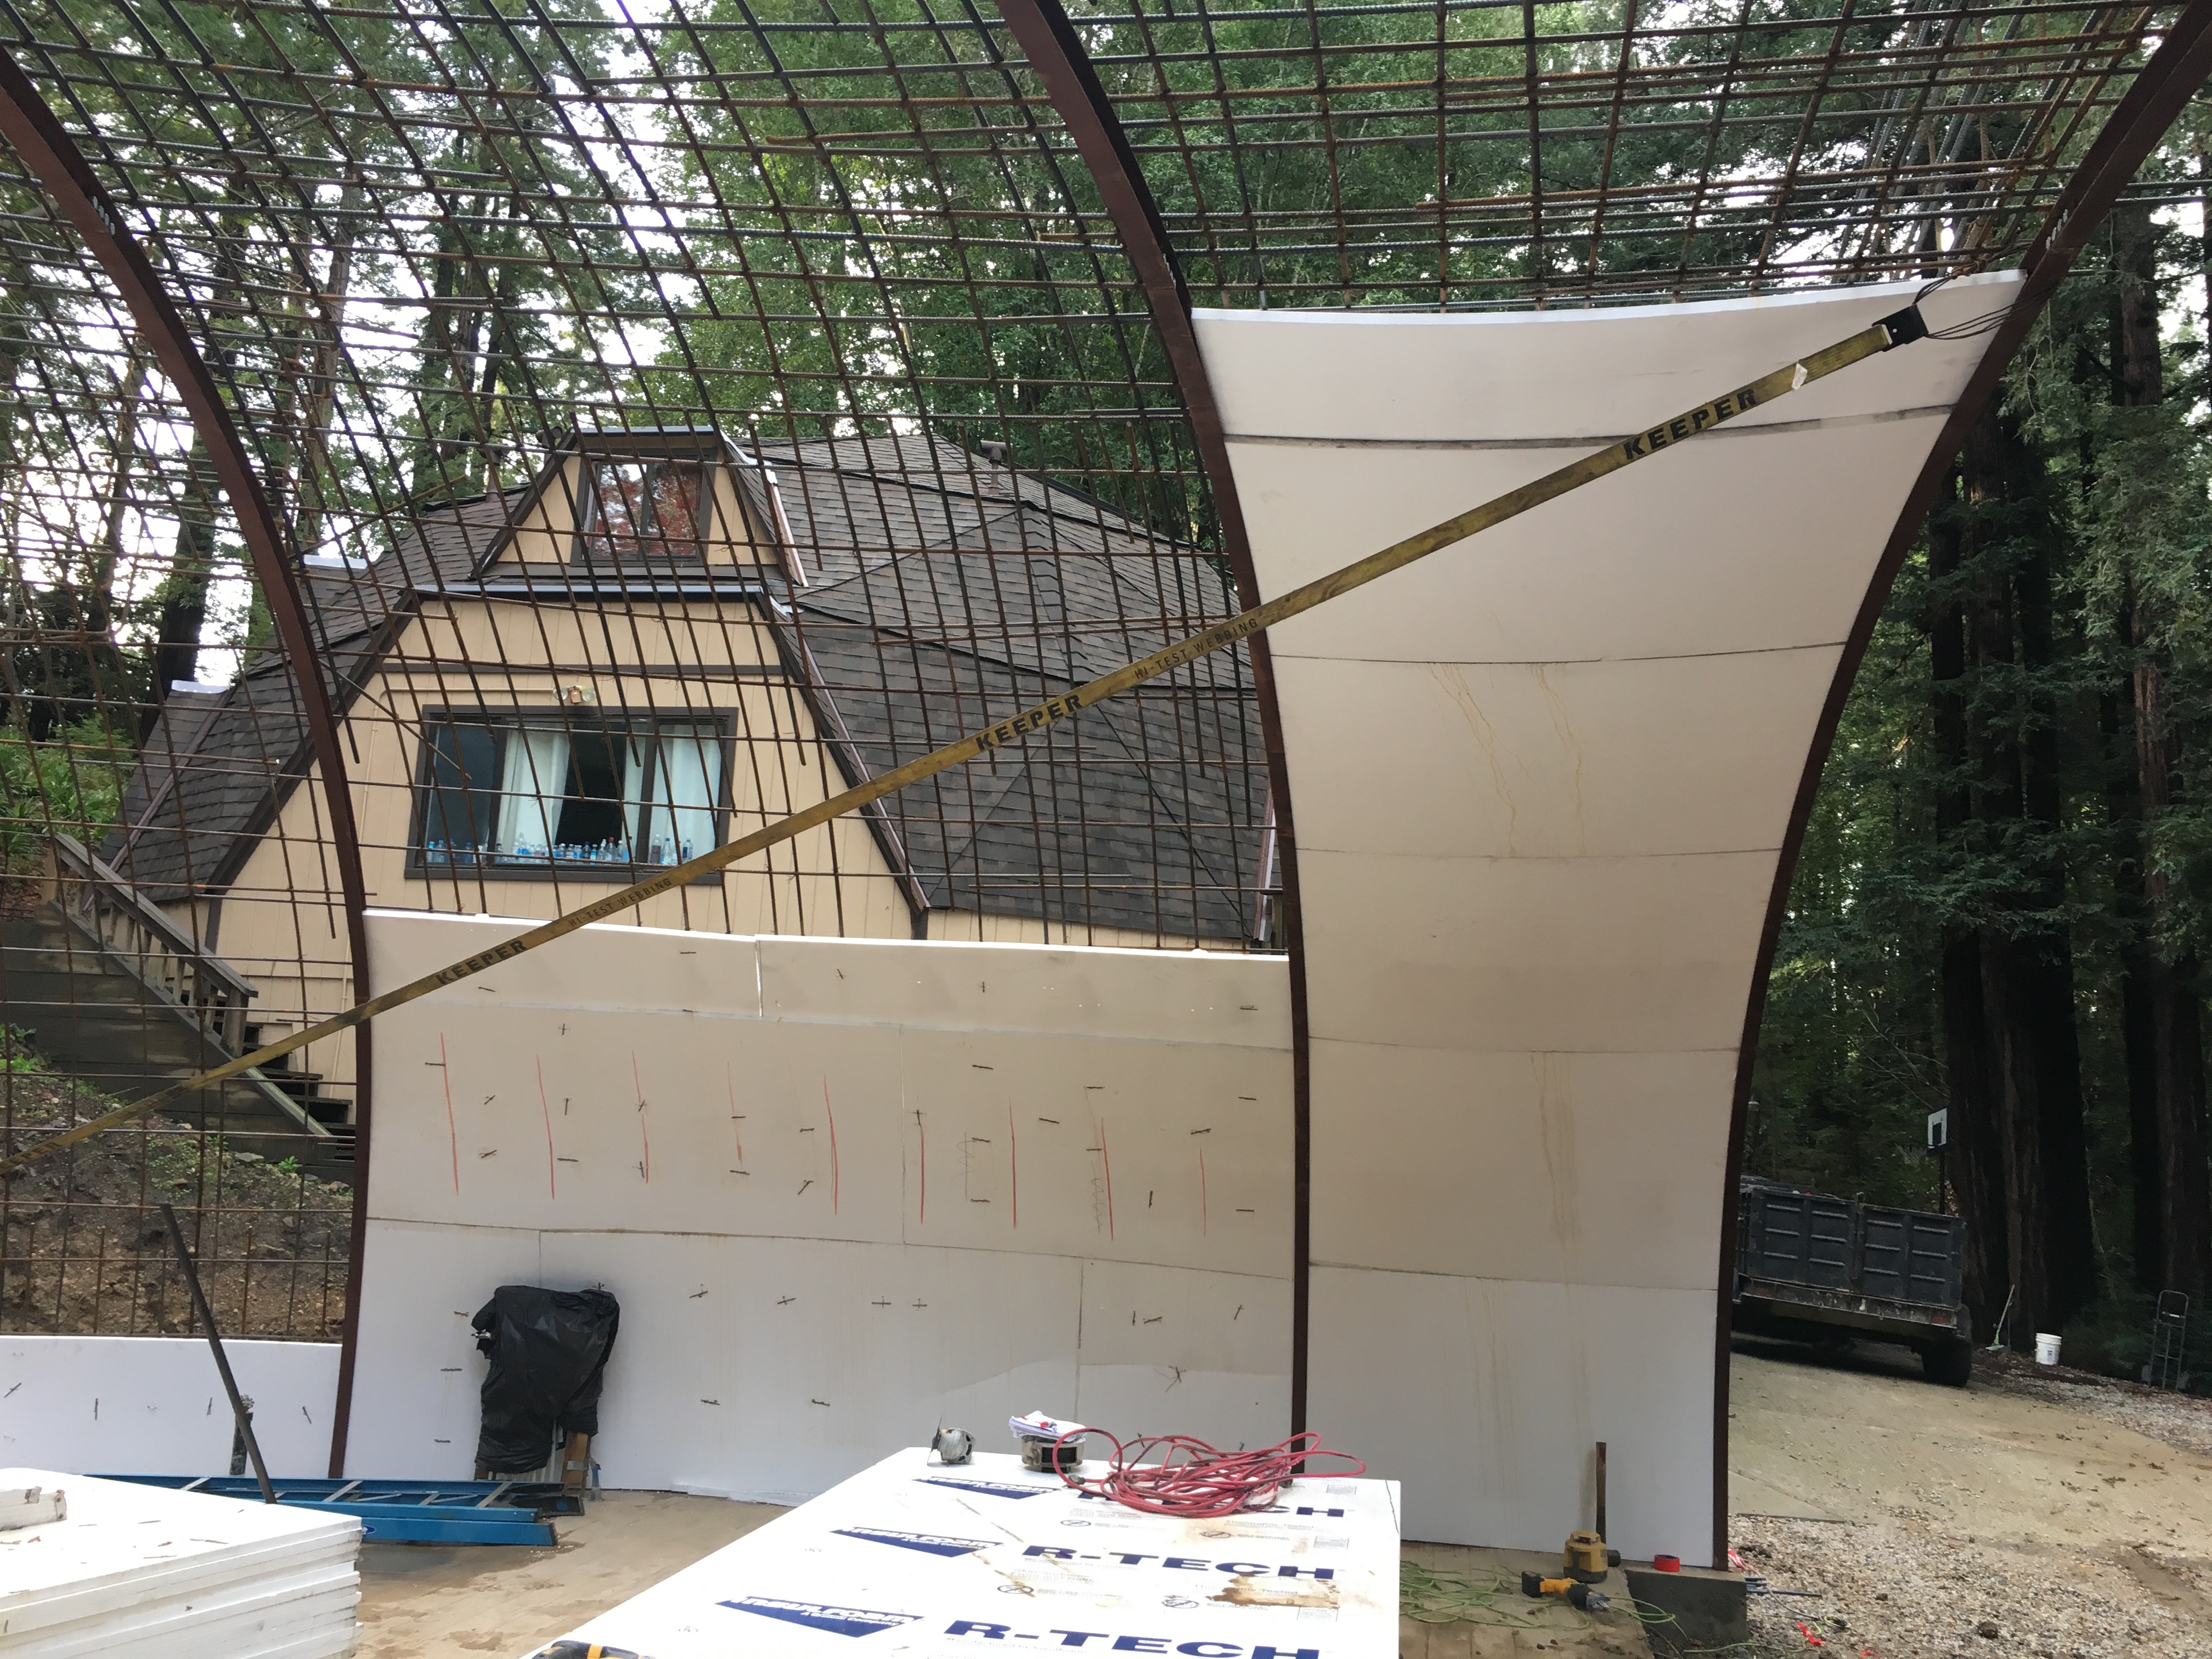

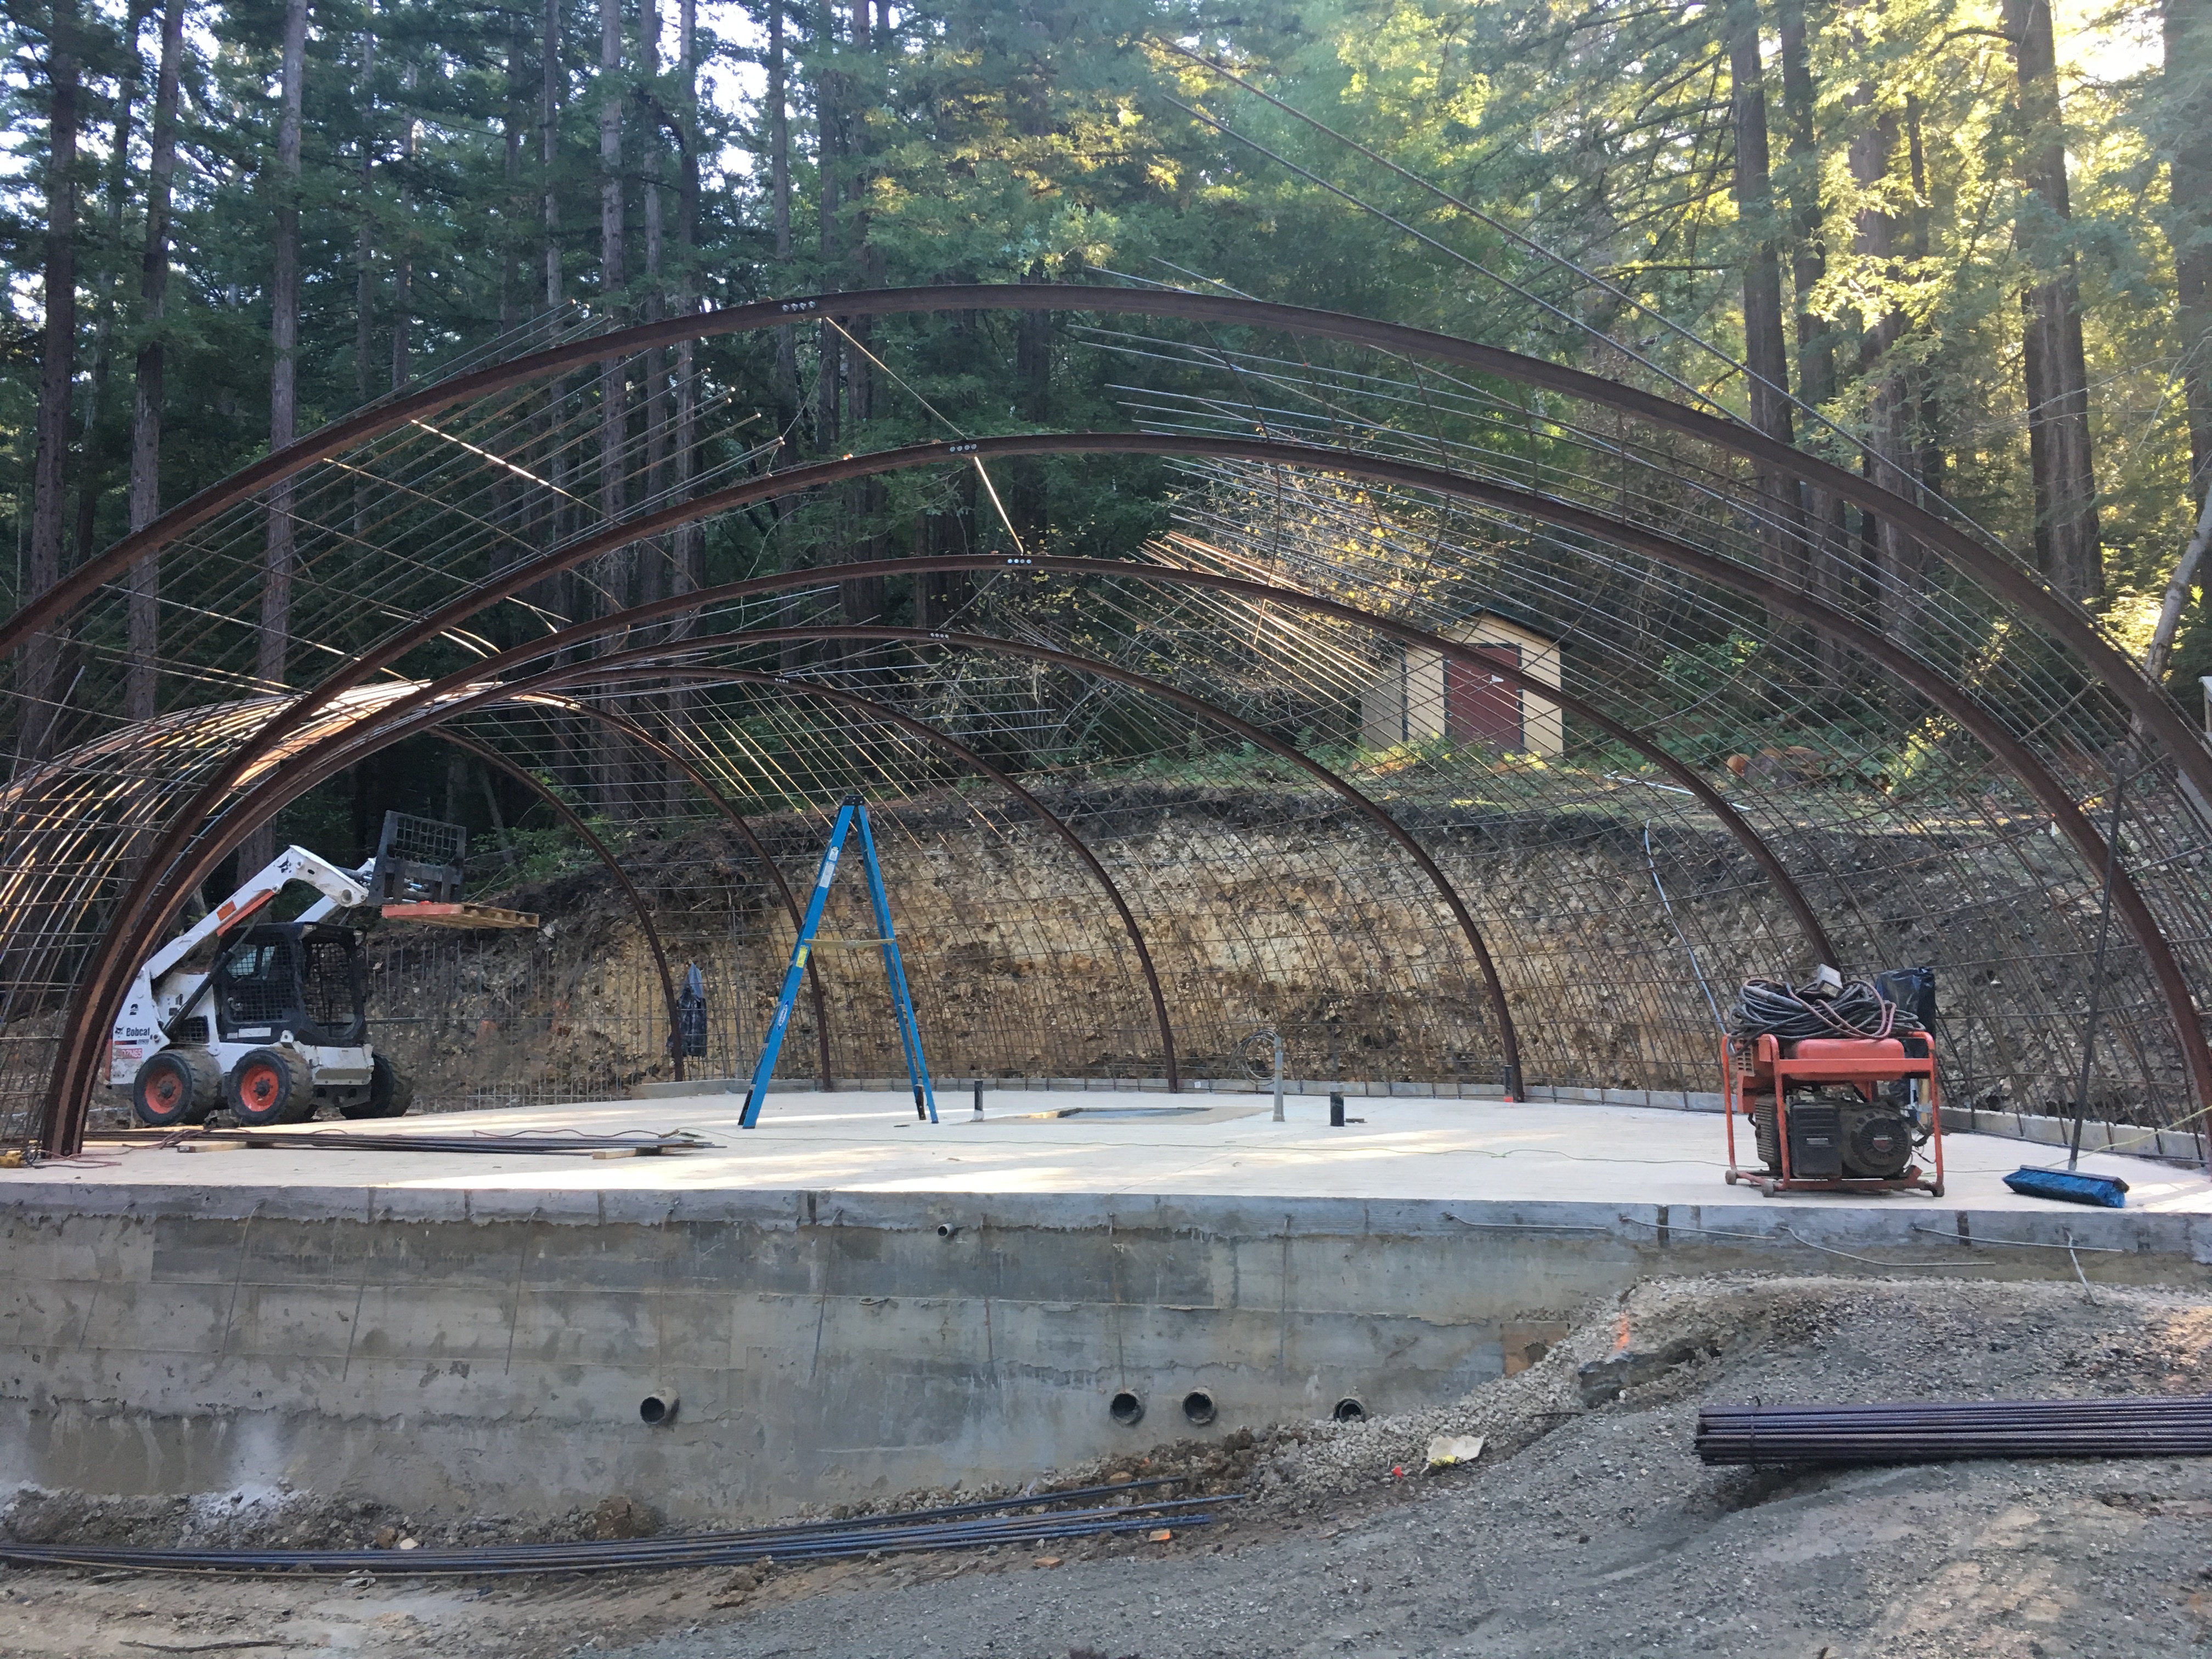
Last Monday, we assembled and raised the seven steel I-beams. They bolt onto brackets we placed in the slab. We started tying rebar across the beams: a tedious process that will continue into next week. Once that is done, and before we begin installing the forms for the shotcrete, we have to decide where to put fixture boxes in the shell, which requires us thinking about lighting.
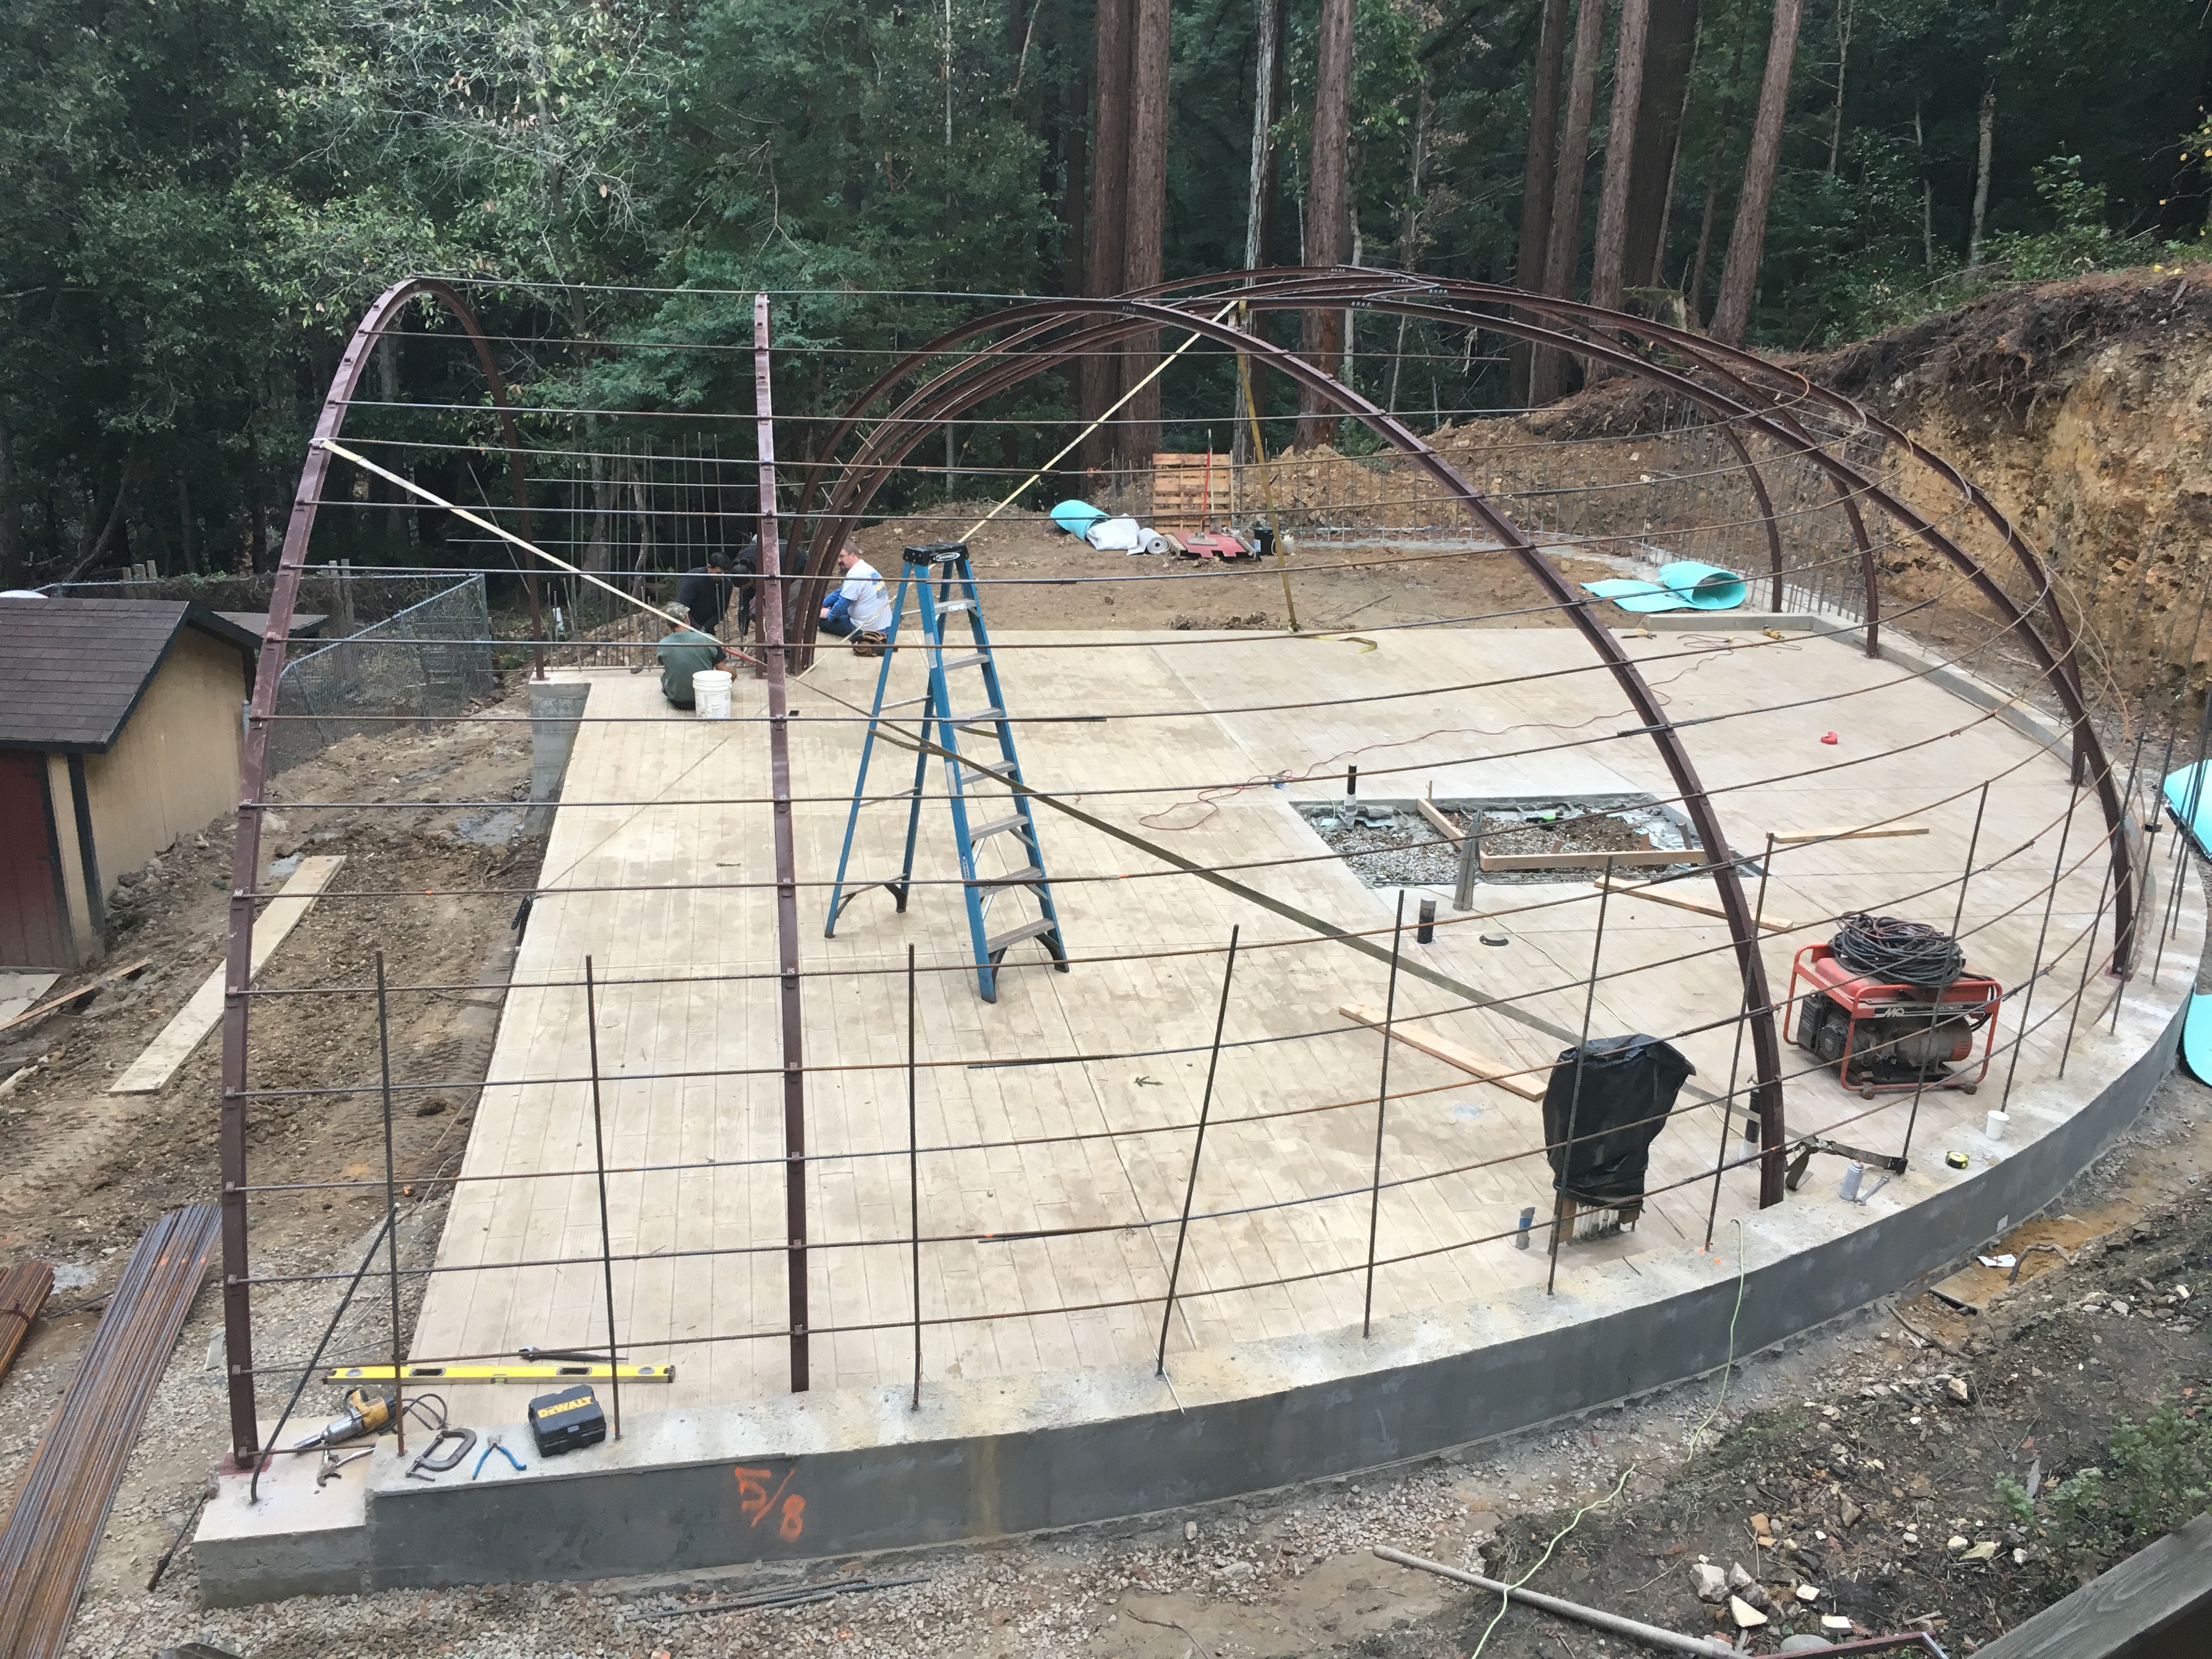

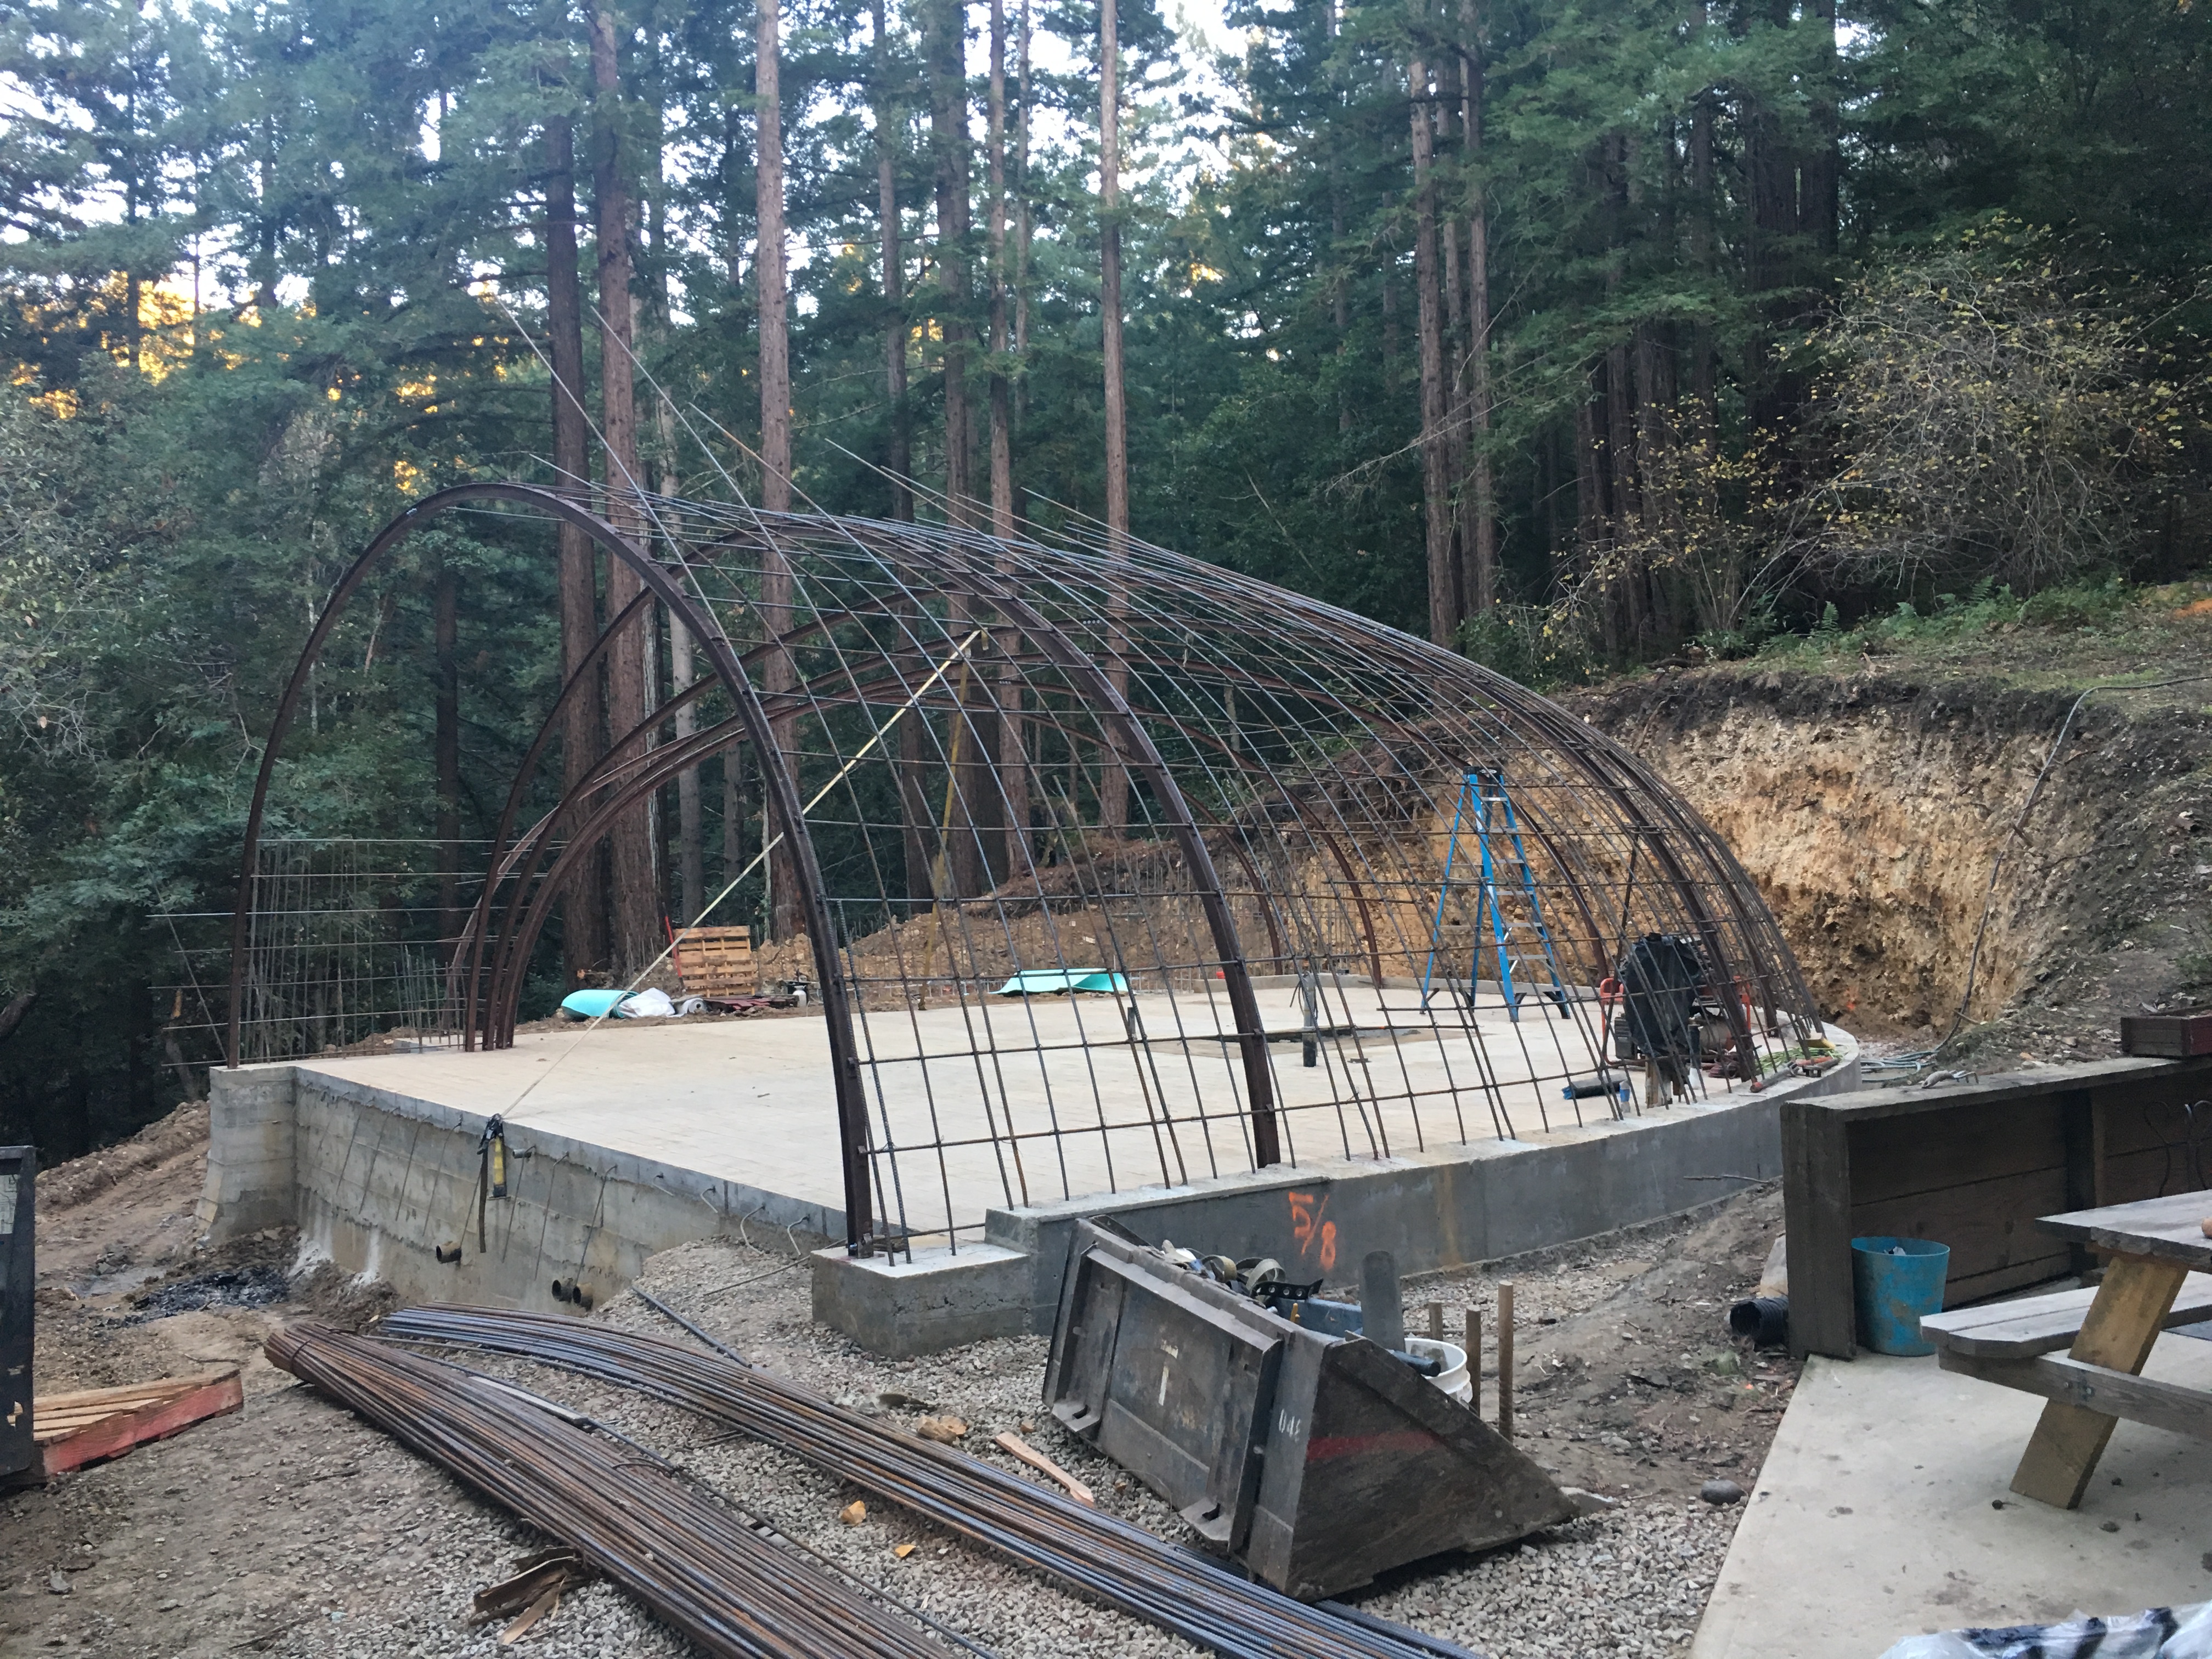
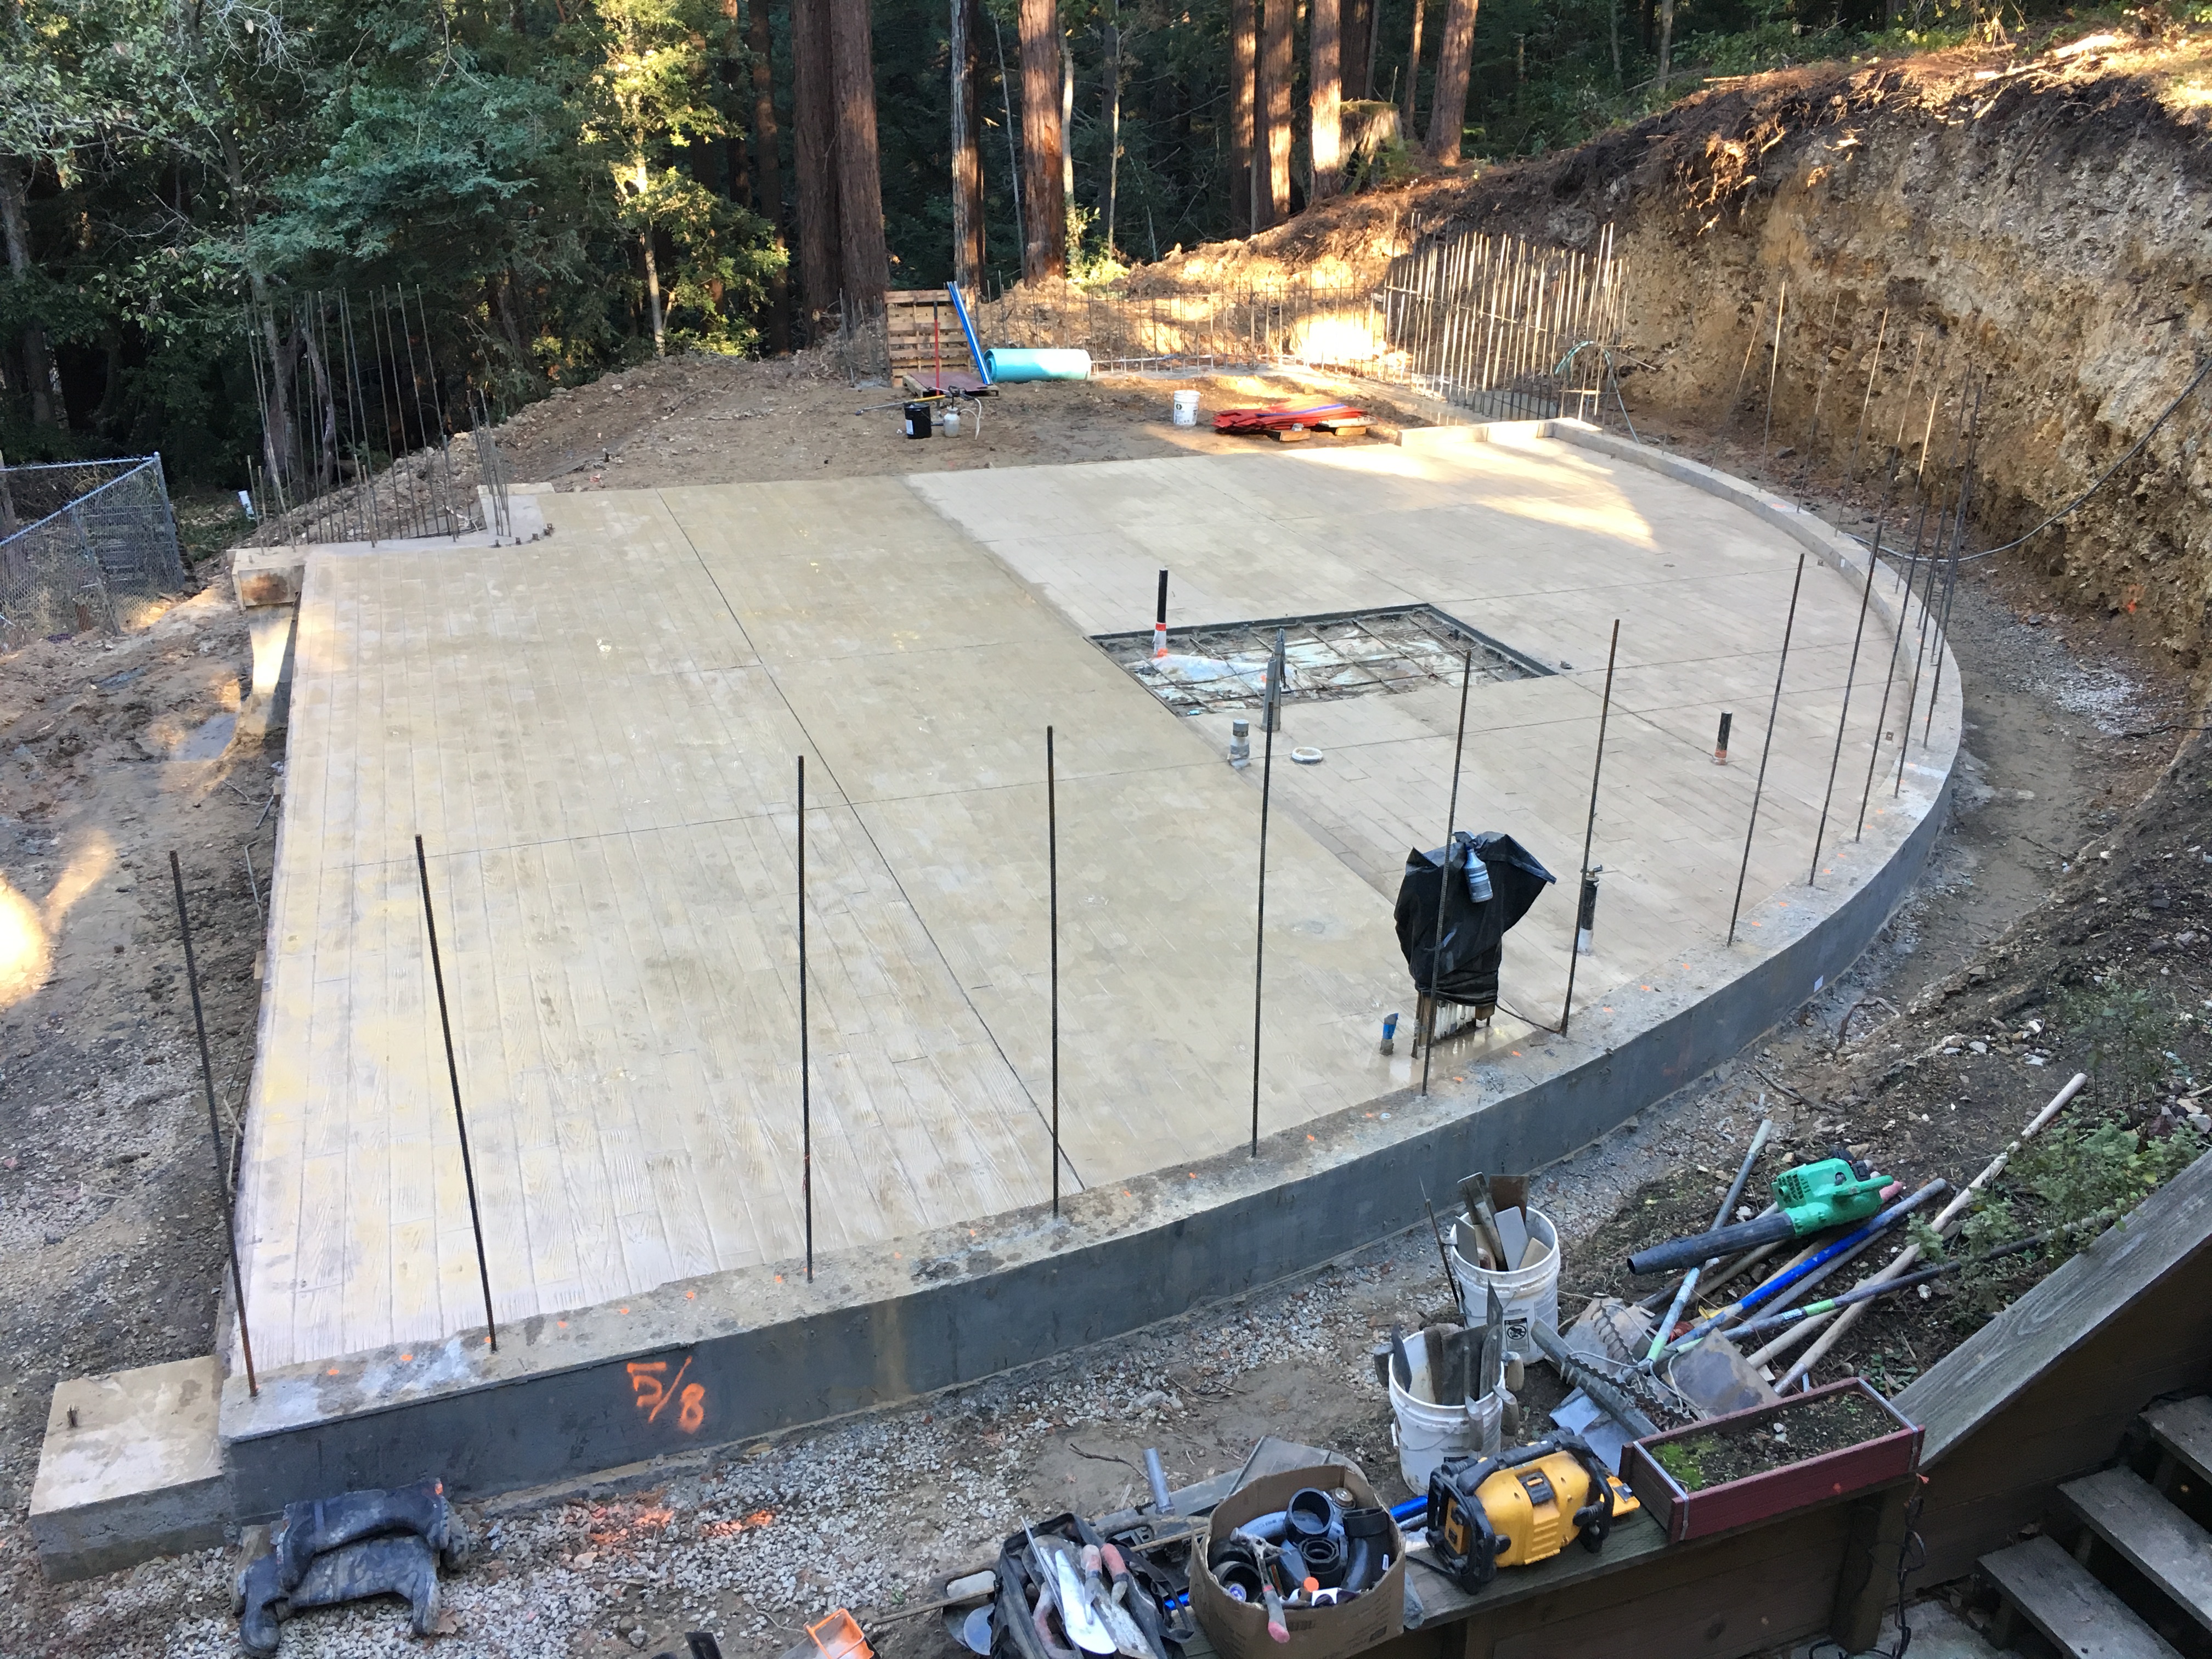
Last week, the slab was poured in two days. It was colored tan with a powdered color hardener and then stamped to look like wood. Later on, it will get more coloring, grout and a sealant. This floor will be indestructible. We left a space for the shower – it will be tiled and needs to slope to the drain.

This one shows the plumbing installation and the slab sandwich.

The slab sandwich starts with a plastic vapor barrier on the native soil followed by a layer of gravel that acts as a capillary break. Above the gravel is a layer of insulation topped by another plastic vapor barrier. Then, comes the rebar and finally tubing for the heated floor system. All that’s missing is the concrete – which should be poured in the next two weeks.
Since the last update, we have also cleared the area outside the north wall in preparation for the retaining wall that will be built there.
Here, you can see the forms for the footings as well as a bonus stem wall that will surround the back of the shell. The stem wall was Frank’s idea and provides additional protection against the hydrostatic pressure of the surrounding earth – instead of relying entirely on the cold joint between the shell and the slab.

After pouring the concrete for the footings and the stem wall, Brian came in and got the plumbing done. All inspections have passed and we’re ready to start on the slab and heated floors as soon as the weather improves.

In one week, Frank, Israel and Nick finished grading the site. Now, they begin work on laying out the foundation.

Two years since the first post, we finally got our building permit and today we broke ground on this project.
We had been thinking about building a “granny unit” on our property for quite some time – but we never took it seriously. We couldn’t settle on the location for the new home, until one day my son called me to his bedroom, pointed to the hill outside his window and said, “Imagine a Hobbit Hole, right there”.
I was sold. It was the perfect site for the home: slightly downhill from our well, and uphill from our septic tank. Close enough to our house that we could run electricity to it relatively easily.
So we began researching the idea and learned about earth sheltered homes and the many advantages they provide.
Earth sheltered homes are extremely sturdy – they stand the test of time. They have been known to survive wildfires, floods and otherwise dangerous storms. These homes have no roof to replace, no siding to repaint and no rain gutters to clean. Many people think of them as bunkers, but they can be designed to be light and airy, and very cozy.
Further research led us to Formworks Building, a company from Colorado that has been building these types of homes for decades, using innovative techniques that pay special attention to energy conservation, waterproofing and air quality concerns.
And so our adventure began.
Now, we are in the process of selecting a configuration and evaluating the site to see what needs to be done.